Real screens from the Speed Plus 9 manual. Open any image to inspect the details.
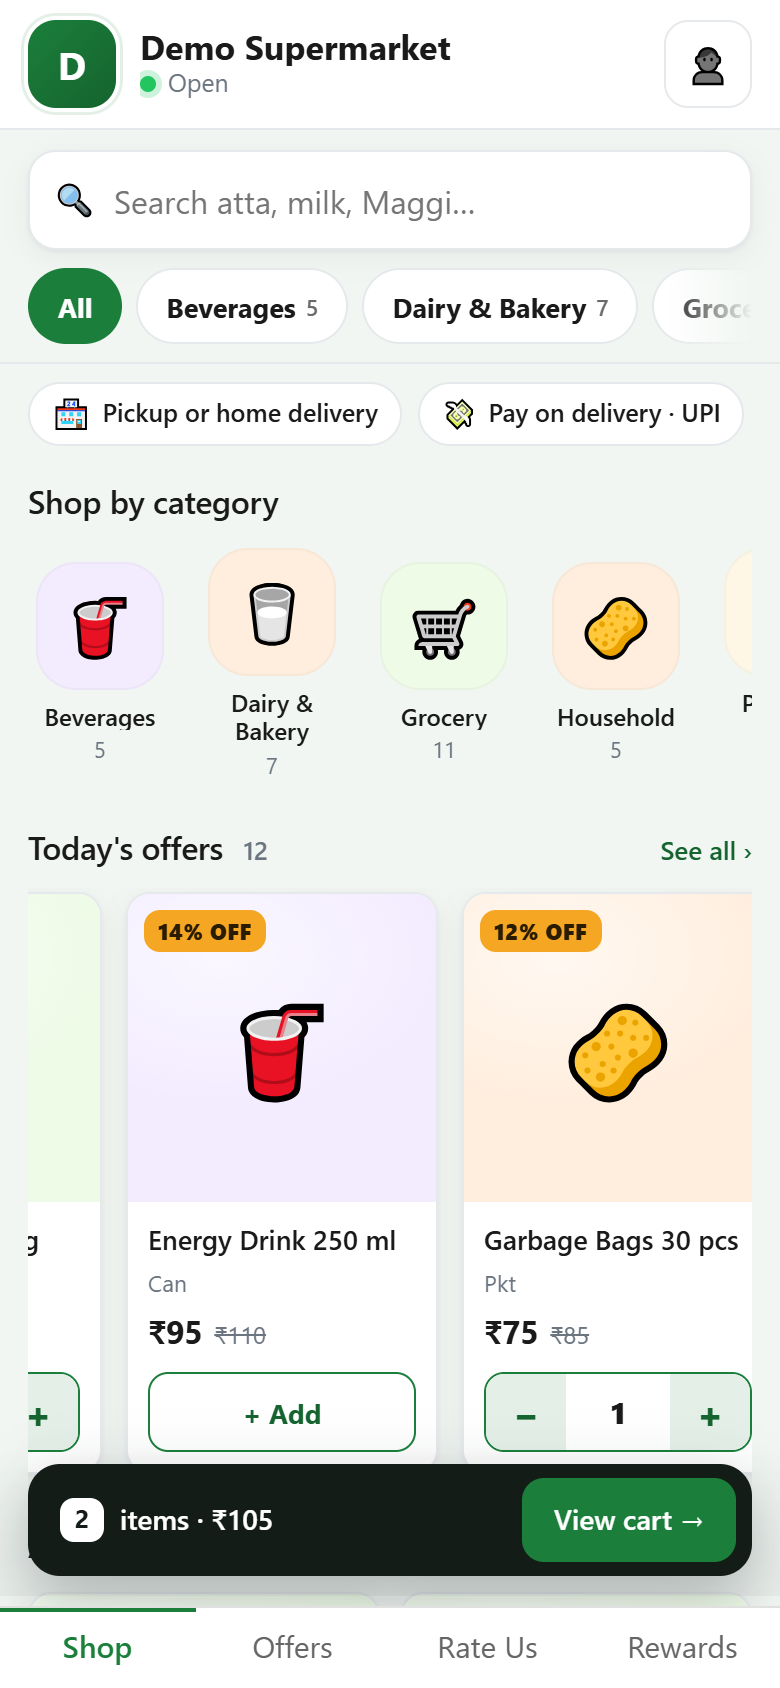
01 / Show the products customers can orderACTUAL PRODUCT SCREEN
View full size ↗The store on a phone: search, categories, today's offers and the cart bar with View cart.
02Check catalogue readiness before sharing+
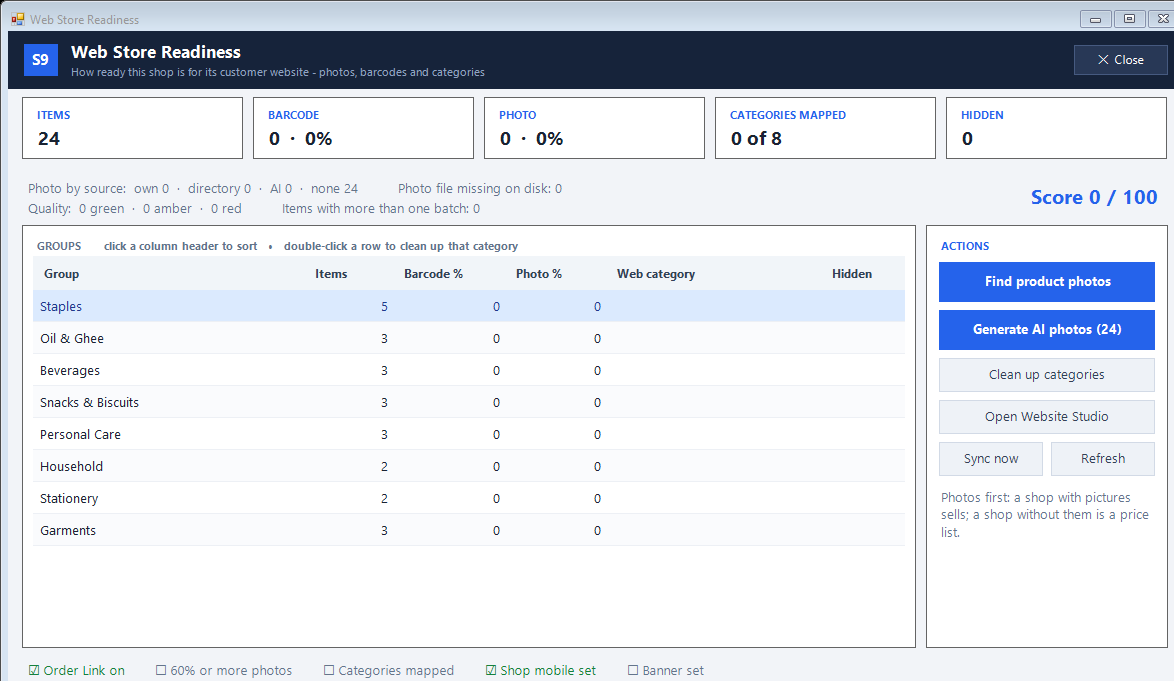
02 / Check catalogue readiness before sharingACTUAL PRODUCT SCREEN
View full size ↗Web Store Readiness: item, barcode and photo counters, the five checks, the action buttons and the groups grid.03Organise the customer-facing categories+
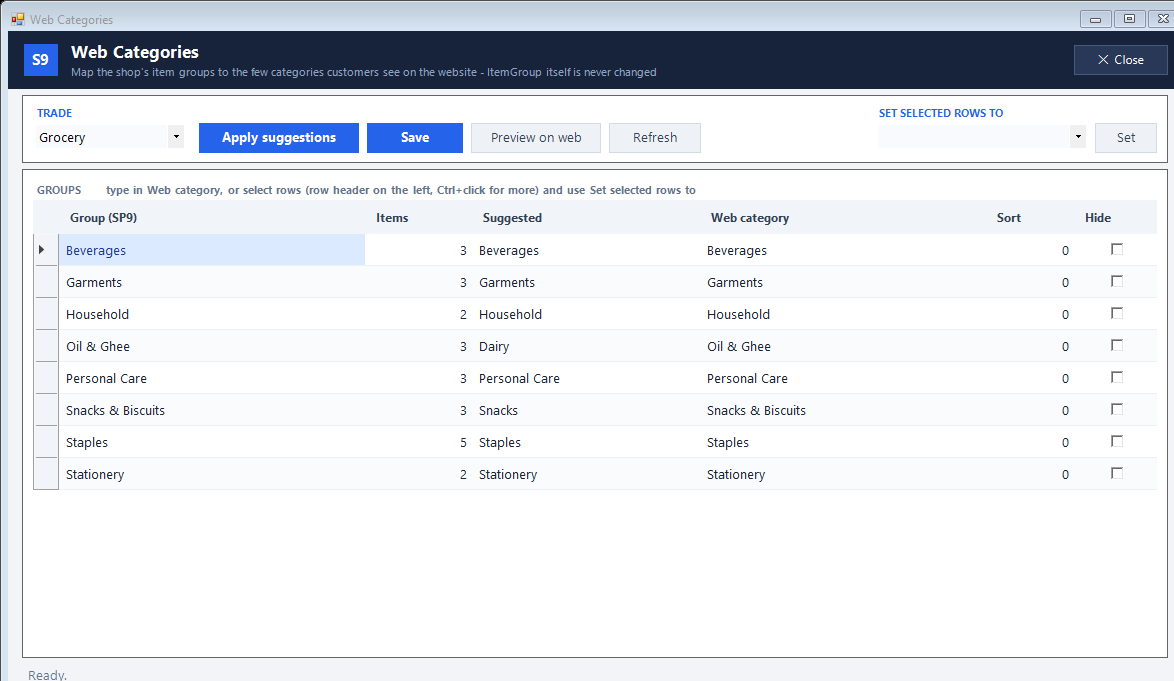
03 / Organise the customer-facing categoriesACTUAL PRODUCT SCREEN
View full size ↗Web Categories after Apply suggestions: each item group mapped to the category customers see.04Review product photos before using them+
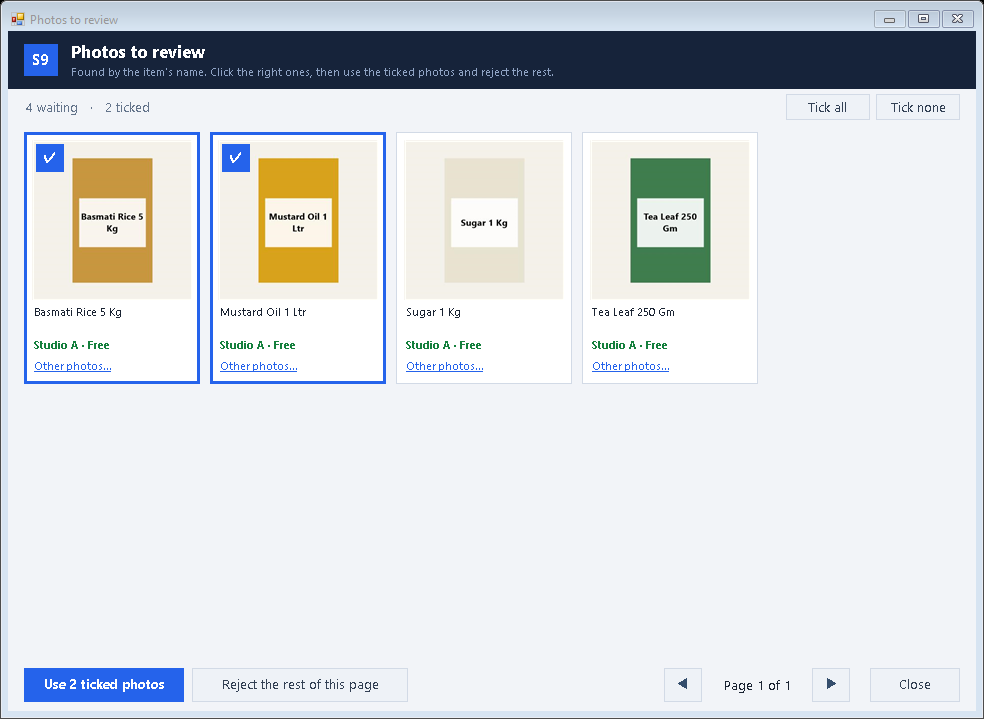
04 / Review product photos before using themACTUAL PRODUCT SCREEN
View full size ↗Photos to review: four items with the picture found for each, two ticked, and the Use ticked photos and Reject the rest of this page buttons below.05Keep offers visible alongside the catalogue+
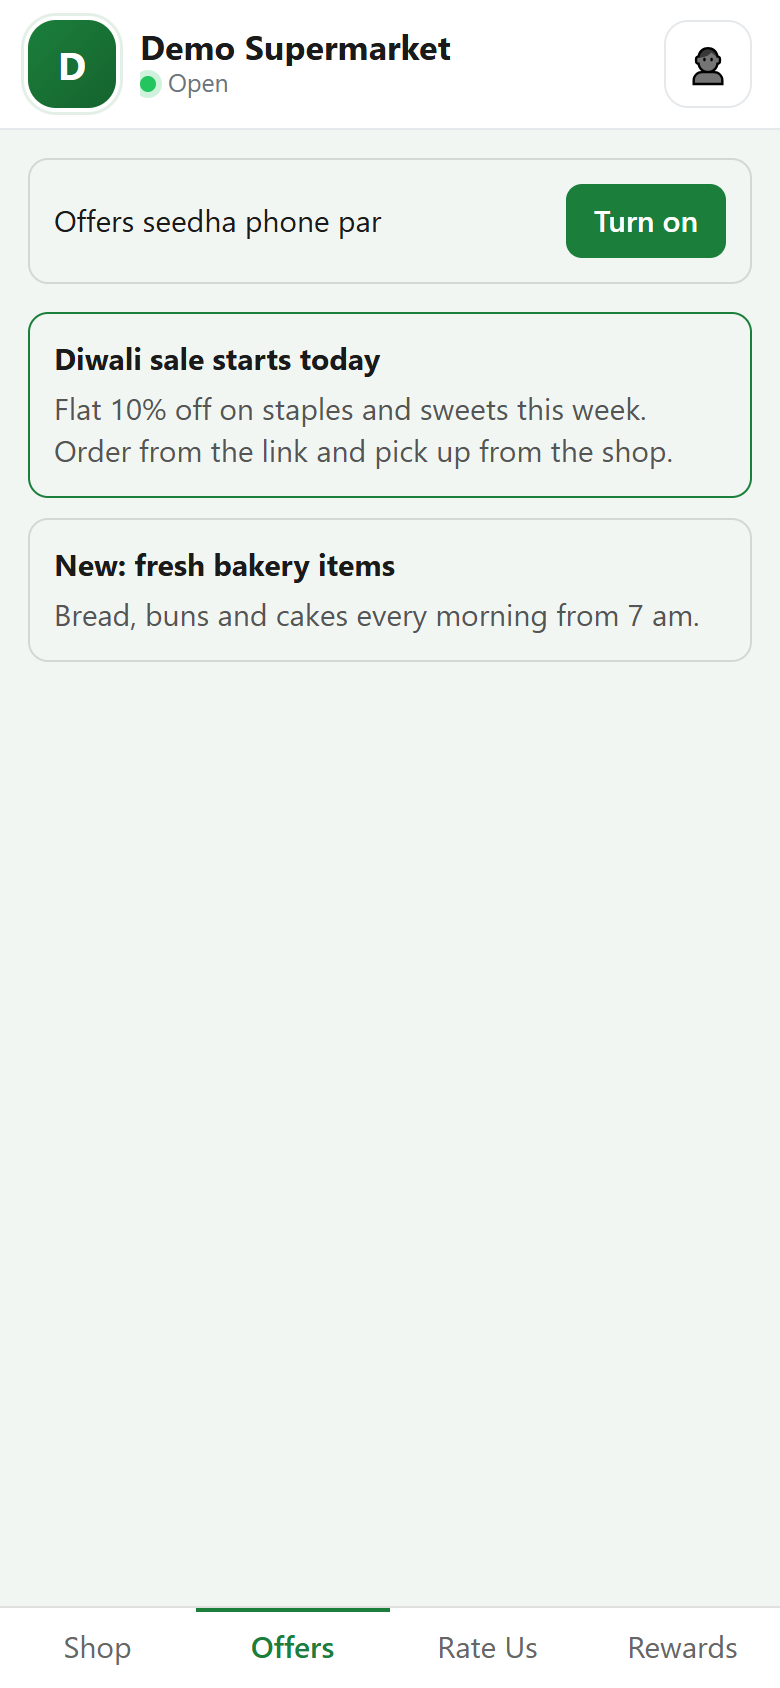
05 / Keep offers visible alongside the catalogueACTUAL PRODUCT SCREEN
View full size ↗The Offers tab: the Turn on card, a pinned post and an older post, with the Shop, Offers, Rate Us and Rewards bar.06Find photos, then review the matches+
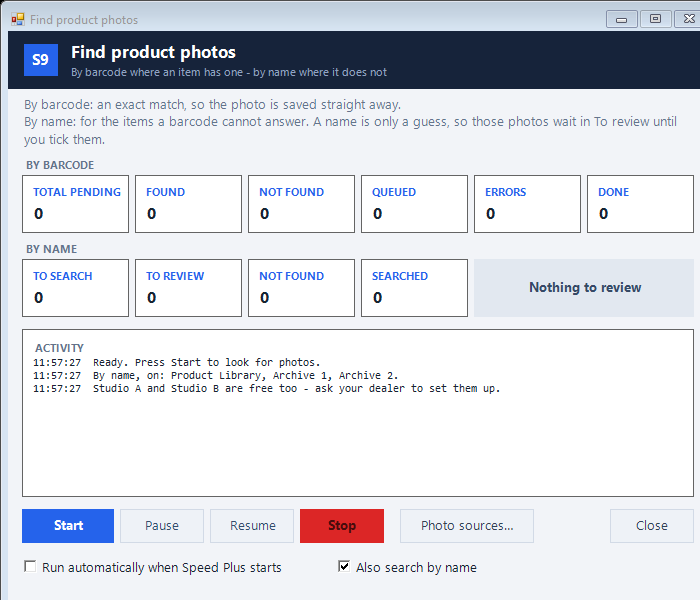
06 / Find photos, then review the matchesACTUAL PRODUCT SCREEN
View full size ↗This capture shows the search ready to start. Name matches wait for review; check the correct product and pack before approving.
UNDERSTAND THE COMPLETE WORKFLOW
Give customers a catalogue they can understand before they contact you.
Web Store presents selected products through a customer-facing storefront. Product names, images, units and descriptions do much of the selling work before an order arrives. A connected catalogue is useful when it is curated for the customer, not merely copied from an internal item list.
01
Prepare the public catalogue
Choose which products should appear, add suitable images and make pack sizes and variants clear. Internal abbreviations that staff understand may confuse a new customer. Check product information on a phone as well as a desktop.
02
Review the customer journey
Open the shared store link, find an item and follow the configured order flow. Check customer details and any delivery or payment information offered by your setup. Publish the business policies needed to set realistic expectations.
03
Handle the order behind the storefront
Review received orders through the connected workflow and confirm availability and final terms. Assign responsibility for fulfilment and customer communication. The storefront creates a convenient starting point; the business still needs to complete the delivery and account process.
Does a connected catalogue mean every item must be public?
Prepare the selection through the supported catalogue settings. Decide what customers should see and confirm the available visibility controls rather than exposing the complete internal item list by default.
Are payment gateways, courier tracking and marketplace connections included?
Confirm each required integration explicitly for your proposed setup, including charges and responsibility. A storefront and order workflow alone do not establish that a particular gateway, courier or marketplace is connected.
What keeps a storefront useful after launch?
Review product availability, images, descriptions and incoming orders regularly. Assign a named owner to updates and customer follow-up so the public catalogue continues to reflect what the business can actually supply.
A CLOSER LOOK AT THE WORKING
Turn the item master into a useful customer catalogue.
Start with readiness
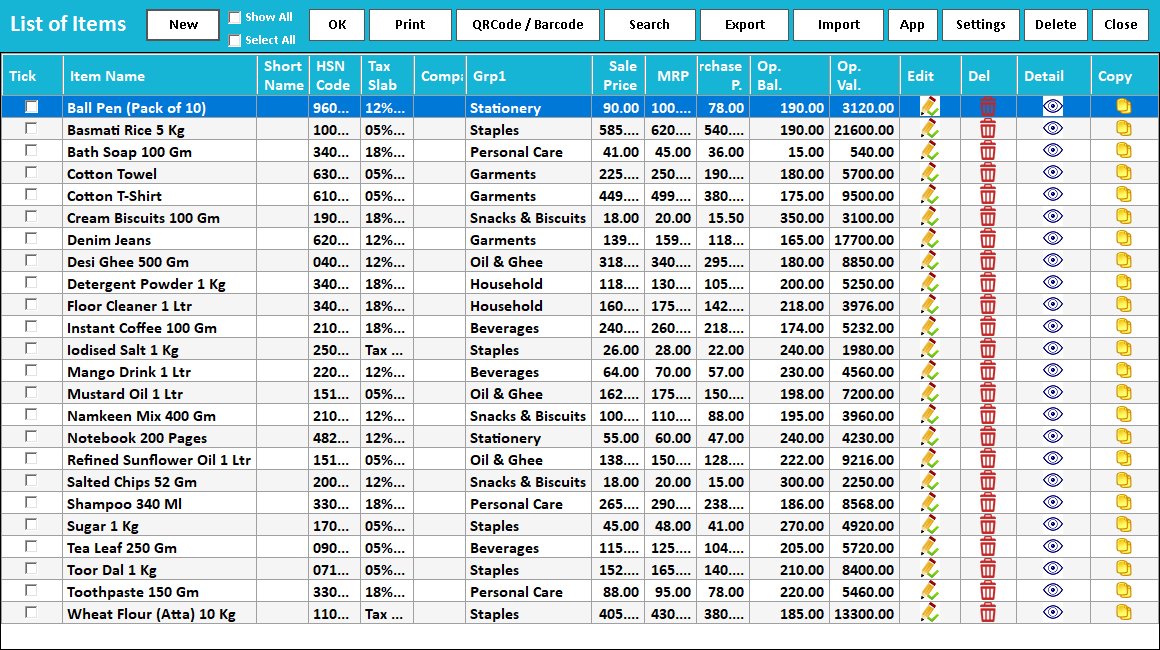
The readiness screen brings together items, barcodes, photos and catalogue checks. Resolve missing product information before sharing the link. Map your internal item groups to customer-facing categories so shoppers can browse without understanding your stock-room terminology.
Review the pictures
The photo-review screen lets you inspect proposed product pictures and choose which to use. Compare pack, brand and variant with the actual item. A visually similar picture can still represent a different product, so do not approve the entire batch without checking.
Give orders an owner
The storefront has a visual catalogue and cart; incoming orders reach the business’s Web Orders workflow. Keep an operator responsible for checking requests, confirming availability and arranging fulfilment. Confirm availability of Offers, Rewards and newer design controls in the deployed version.
Publish selected products with their configured information and images.
02
Share your storefront
Give customers a store link they can open in their browser.
03
Customer orders
Receive storefront orders through the connected order workflow.
04
Manage from your business
Coordinate catalogue, store settings and order review with your Speed Plus setup.
HOW IT WORKS
Get connected in three steps.
01
Prepare the products, images and store settings.
02
Share the storefront link with your customers.
03
Review incoming orders and complete fulfilment through your business process.
Before you get started
What setup does Web Store need?
Confirm the supported edition, licence, devices and connection requirements with Solver Solutions. Connected workflows need the relevant server and Speed Plus integration configured.
Can I try it with my own business workflow?
Yes—request a demonstration with a small sample of your items and typical transactions. Ask the team to show entry, review and the resulting business records.
What does it cost?
Request a current quotation covering the product, installation, training, hosting and any recurring services needed for your setup.