Prepare the branch
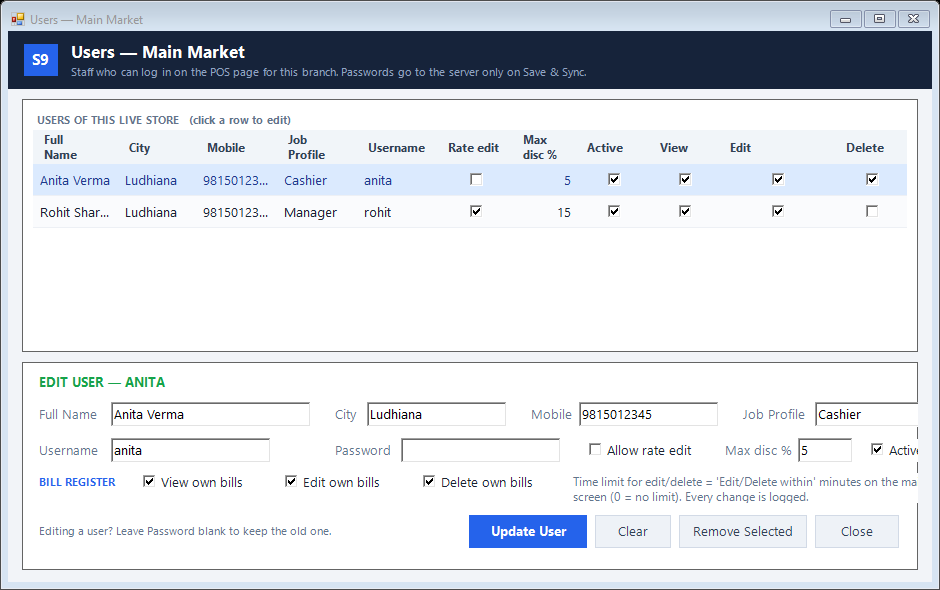
Configure the branch and its sale, cash, UPI and card accounts. Assign users and review rate-edit permission and discount limits. Branch-wise stock and account mapping help keep one outlet’s transactions identifiable.
Browser-based branch billing connected to your Speed Plus head office.
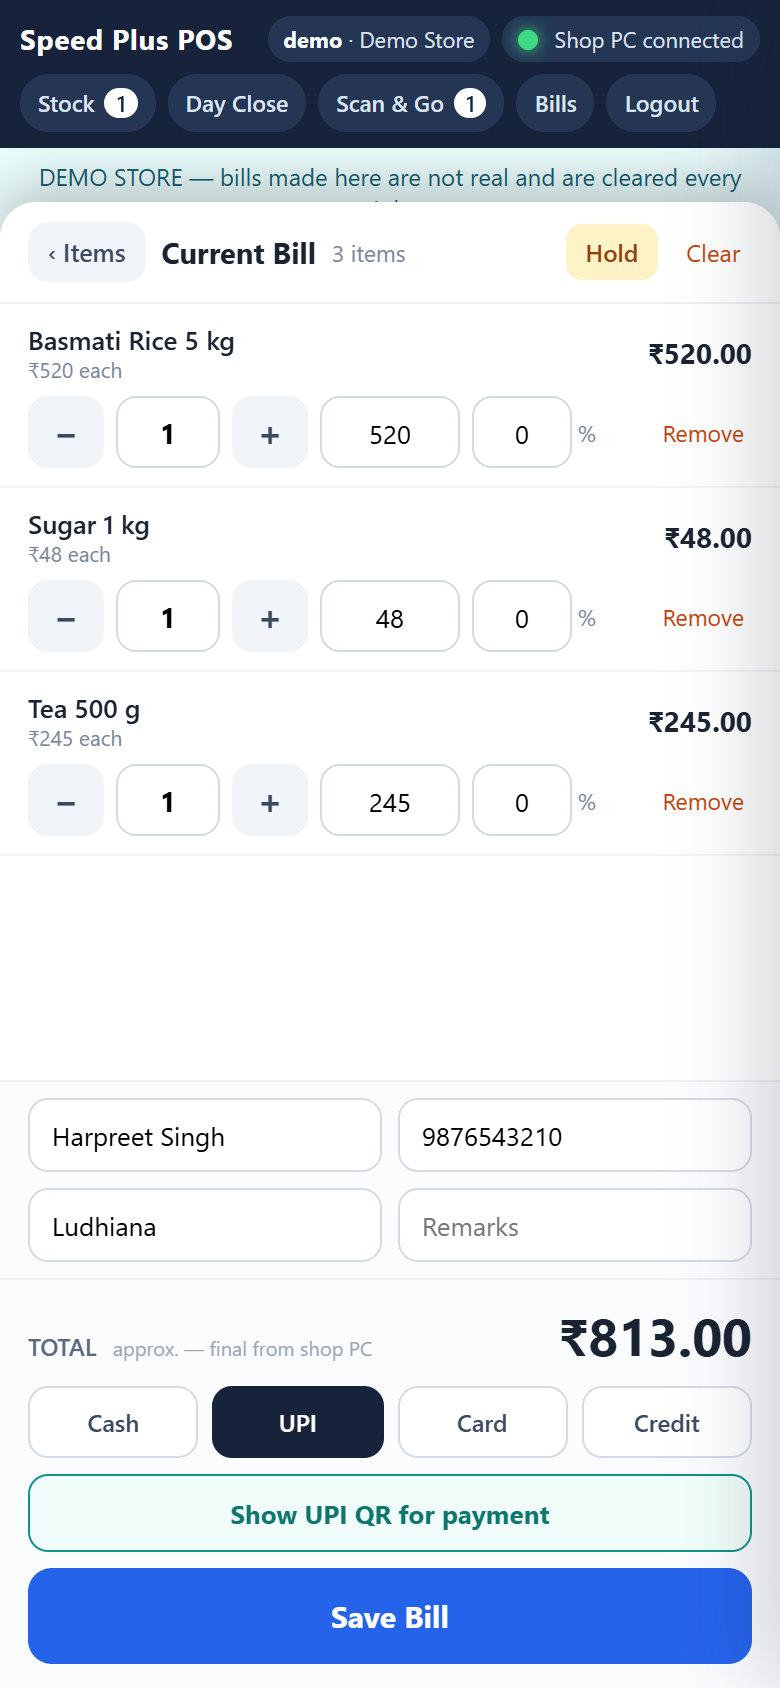
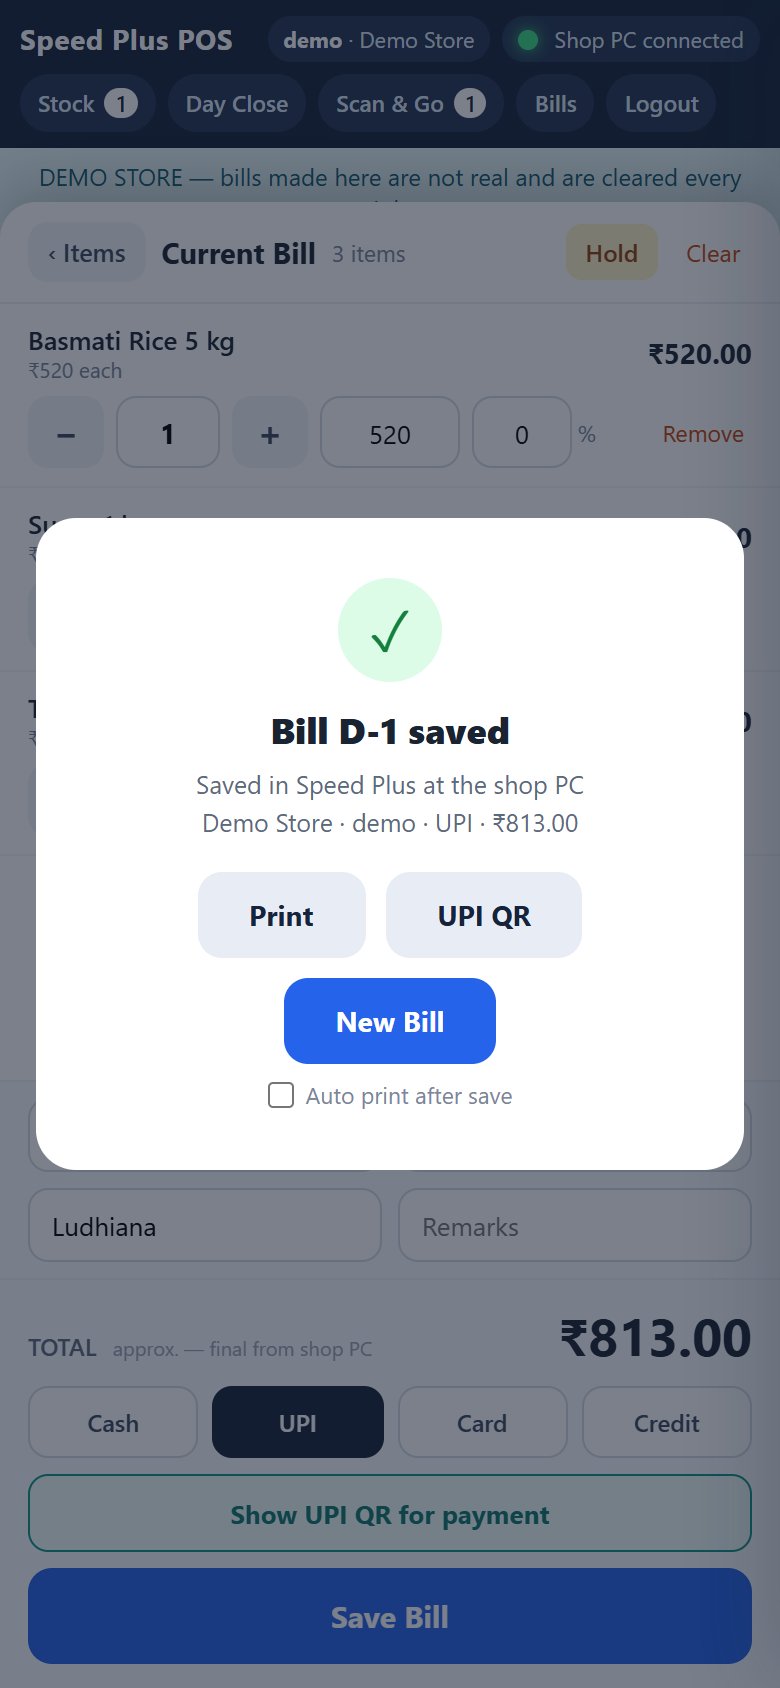
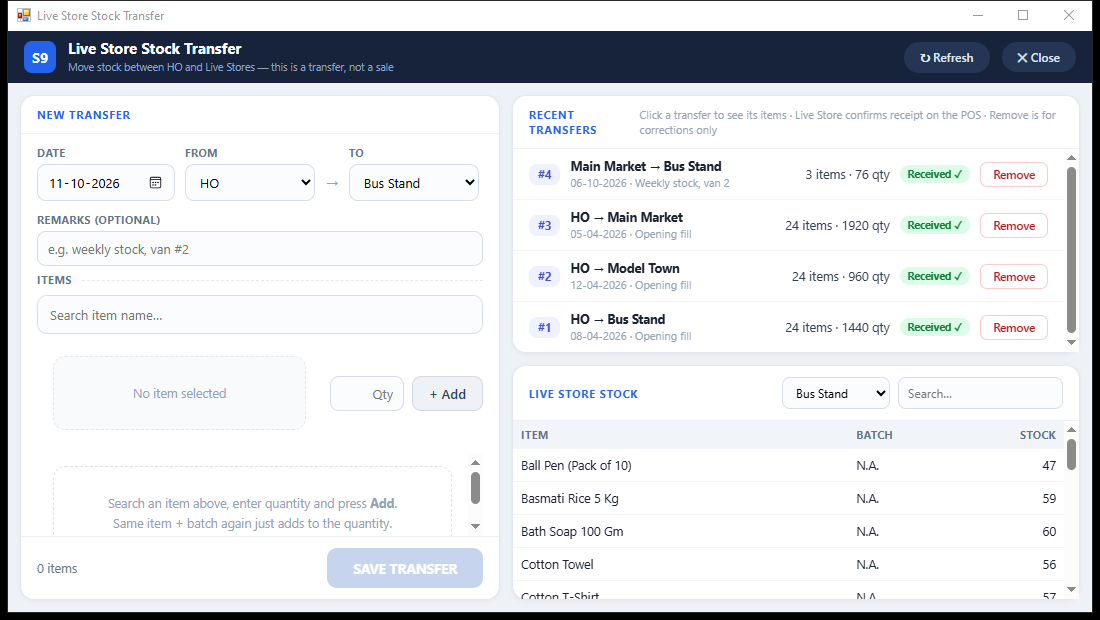
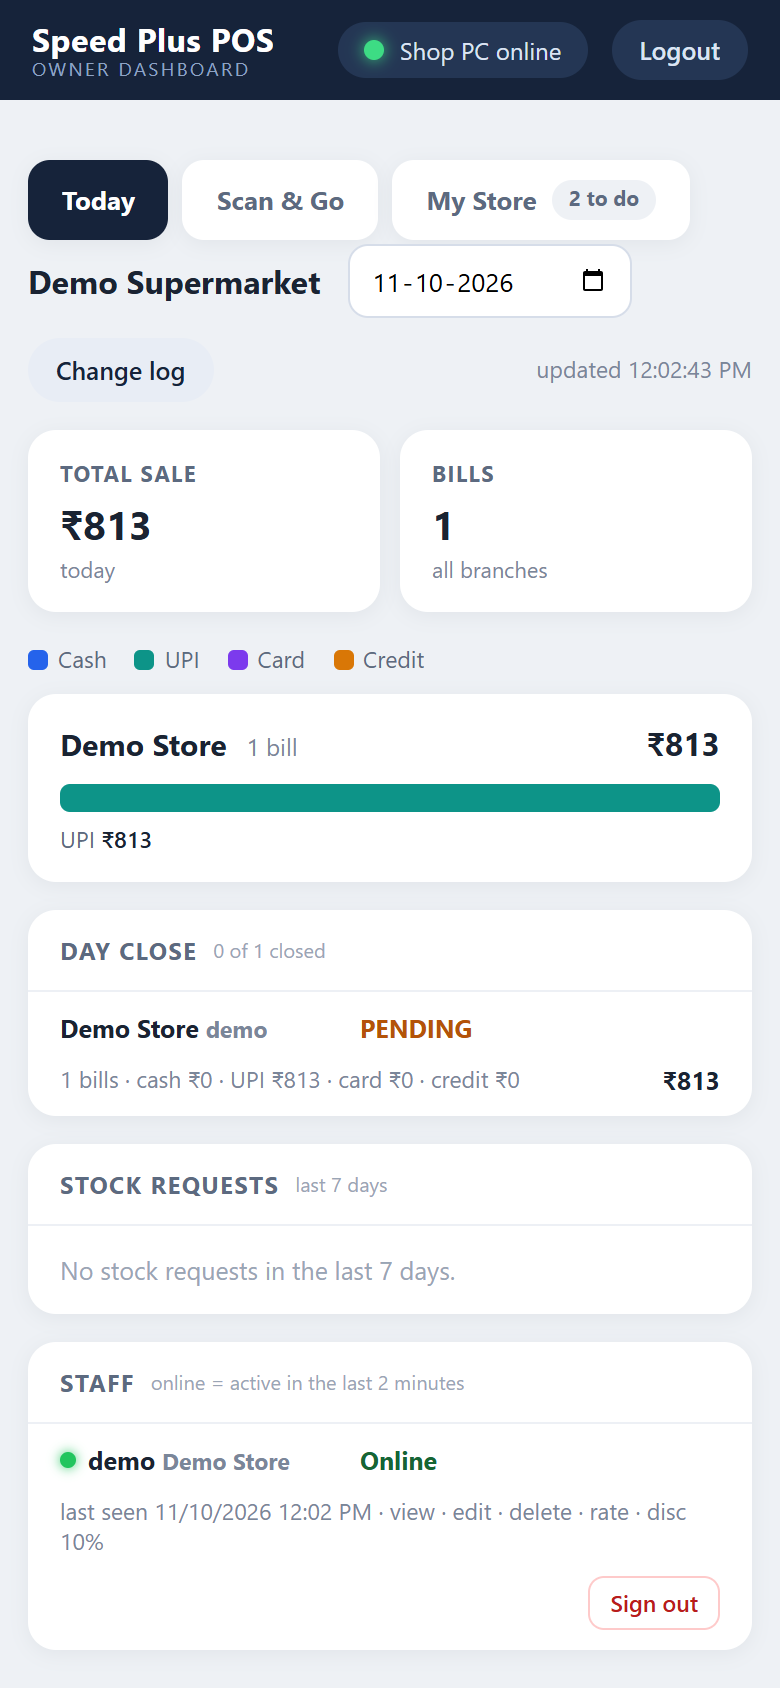
Real screens from the Speed Plus 9 manual. Open any image to inspect the details.
 View full size ↗
 View full size ↗
 View full size ↗
 View full size ↗
 View full size ↗
 View full size ↗
Web POS gives a branch a browser billing interface while Speed Plus at head office handles the connected business records. The important idea is the complete journey from branch submission to head-office acknowledgement, not simply whether the cashier pressed Save.
Configure the branch and its sale, cash, UPI and card accounts. Assign users and review rate-edit permission and discount limits. Branch-wise stock and account mapping help keep one outlet’s transactions identifiable.
The cashier signs in through the configured URL, selects the customer and items, checks quantities and payment allocation, and submits. Customer name and the required mobile details should be entered carefully so the transaction has the intended identity.
The connected server passes the request through the queue to head-office Speed Plus. Speed Plus imports the bill and returns its acknowledgement. Check the resulting reference and status before treating a pending branch request as a completed head-office posting.
The documented branch workflow runs in the configured browser interface. The server connection and head-office Speed Plus integration still need to be set up and operational.
A submitted request can remain pending in the connected workflow. Confirm the supported queue and recovery behaviour during your demo. Do not assume an offline request is already a final acknowledged invoice, and avoid duplicate submission while investigating.
Confirm branch account mapping, stock scope, users, discount rules, connection capacity and the daily pending-bill review. Pilot one branch and reconcile its bills and payment methods before rolling the same setup out to the others.
A Live Store is a selling point inside the same Speed Plus company. It shares that company’s books, items and financial year. Give each branch its own sale type and cash, UPI and card accounts. A branch with separate books or a separate business identity needs a different setup discussion.
A final saved bill number confirms head-office posting. A provisional W reference means the head-office PC has not yet recorded the request. Saved offline means the request is still on the branch device. Review My Bills and its status before resending or giving another bill.
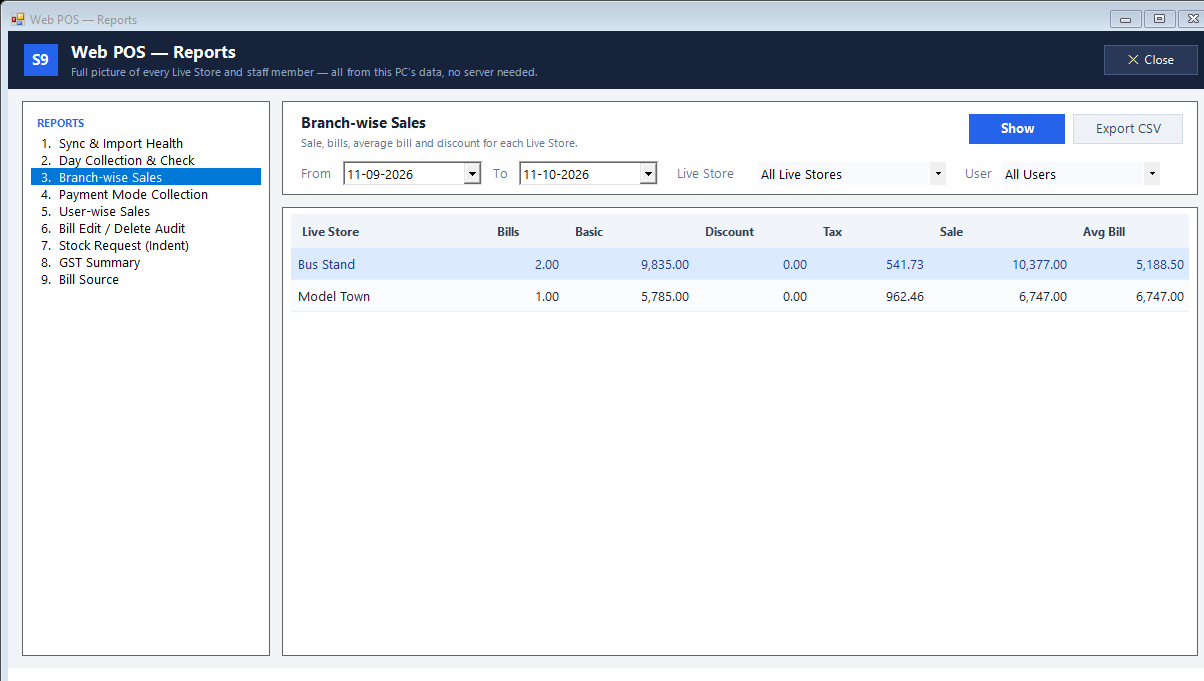
Use the owner view and branch reports to review saved sales and their payment split. Stock transfers have their own screen: select the destination Live Store and inspect its resulting stock. Keep collection review separate from the total sales figure.
Review sales and discounts for branches and operators.
Record a branch transfer and investigate received shortages.
Understand Saved, Queued and device-offline bills.
Set branch staff rights and test the allowed discount.
Set up the first branch and sync its details.
Understand branch billing with head-office records.
See how branch billing connects with head-office Speed Plus.
Open the configured POS URL and sign in to start a branch billing session.
Keep sales associated with their branch and review branch-wise stock.
Handle configured cash, UPI, card and customer-credit workflows.
Set rate-edit permissions and discount limits for each user.
Configure branches, users and payment accounts in Speed Plus.
Sign in from a branch browser and prepare the sale.
Check that the bill is acknowledged and recorded in the head-office system.
Confirm the supported edition, licence, devices and connection requirements with Solver Solutions. Connected workflows need the relevant server and Speed Plus integration configured.
Yes—request a demonstration with a small sample of your items and typical transactions. Ask the team to show entry, review and the resulting business records.
Request a current quotation covering the product, installation, training, hosting and any recurring services needed for your setup.
These guides explain related Speed Plus capabilities. Confirm which are included in your selected product and setup.
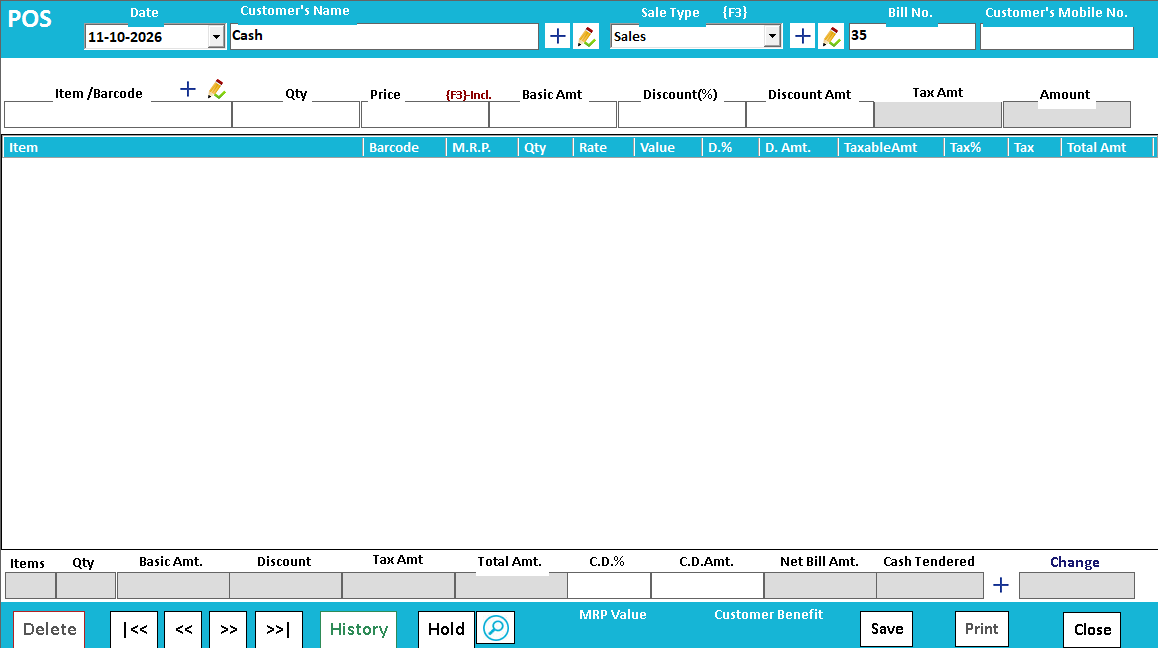
Scan items. Take payment. Print the bill.
Read the guide →Scan the label. Find the right item.
Read the guide →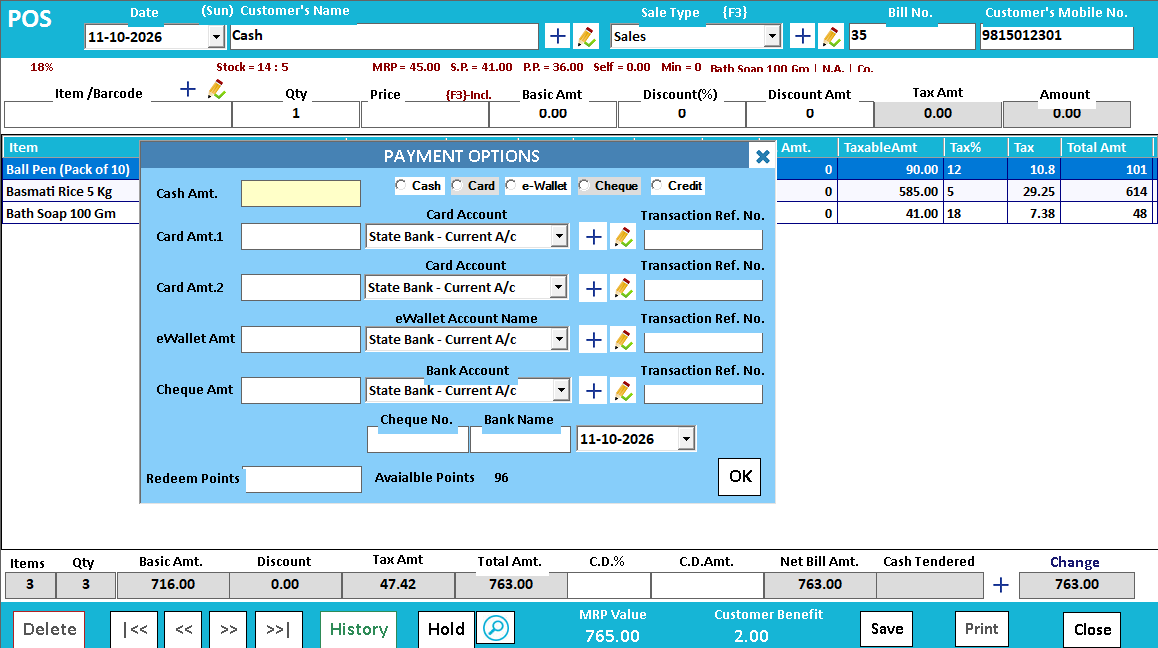
One bill, more than one payment mode.
Read the guide →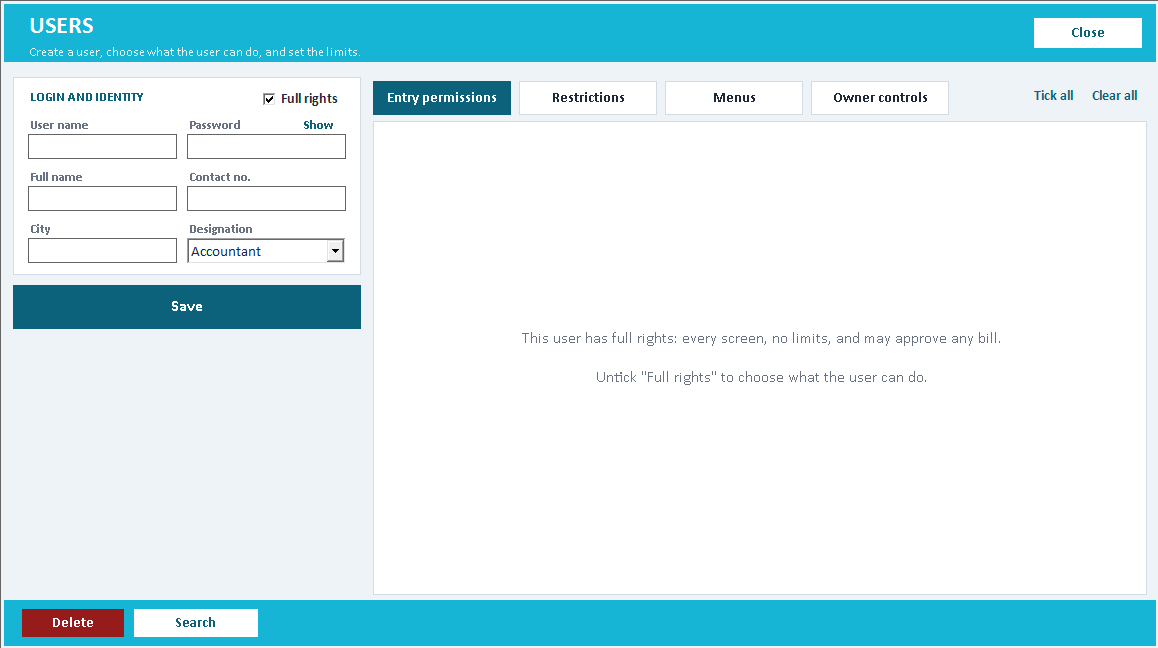
Give staff the access their work needs.
Read the guide →