Give staff the access their work needs.
Configure available user rights for the intended roles. Test each account against its actual entry and reporting responsibilities before staff begin using it.
Named user and role
Allowed actions in the workflow
Controlled day-to-day access
See the screens behind the workflow.
Real screens from the Speed Plus 9 manual. Open any image to inspect the details.
 View full size ↗
Review entry rights and menu access separately.
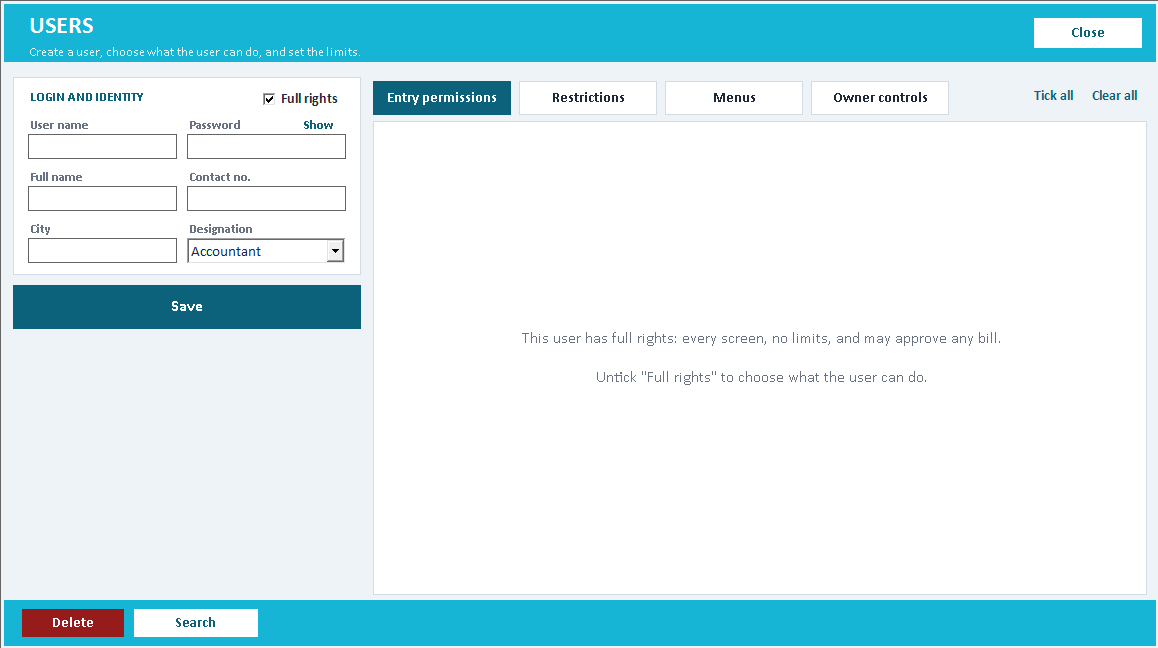
The Users screen groups controls into Entry permissions, Restrictions, Menus and Owner controls. Review the actual login used by each role. The screenshot establishes where these settings live; newer owner-approval controls still need confirmation in the installed release.
Give each person access that matches the work they do.
User rights separate the responsibilities of a cashier, accounts operator, manager and owner. Individual logins also make it easier to discuss who performed an action. The aim is to let staff complete their role without giving every user the same editing powers.
Create the supported user roles and review the actions each role needs. Test with the actual restricted login, including an allowed task and a sensitive task such as an edit, deletion or discount. Branch Web POS also has documented rate-edit and maximum-discount controls in its own setup.
How to use it.
Give staff the access their work needs.
- 01
Create separate user accounts
- 02
Assign the supported rights for each role
- 03
Test allowed and restricted actions with sample entries
What this looks like in your business.
A cashier needs billing access while the owner needs broader reports and settings.
Give each operator a clear working role.
Follow the decisions as well as the clicks.
- 01
Create an individual login
Open User Information / User Master and add the staff member. Separate logins let you assign access to the person doing the work.
- 02
Choose the required rights
Set the relevant entry, editing, deletion and report permissions. Start with the actual tasks the person performs at the counter or in accounts.
- 03
Try the role in a sample workflow
Sign in with that user and perform an allowed task. Also check that a restricted action, such as deleting a bill, is unavailable before handing over the counter.
- 04
Review access when duties change
Update the profile when an operator changes role. Keep owner-level settings with the person responsible for the business records.
Based on User Manual 2026 · 2.6. Screen names and availability can vary by installed version.
Good questions.
Clear answers.
Choose the workflow that fits your business and confirm its setup in a demonstration.
Is hiding a menu item enough to prove an action is restricted?
No. Test the actual action through the supported workflow using the restricted account. Agree the controls available in your installed version and review them when staff responsibilities change.
What setup should I confirm?
Permission coverage varies by screen. New owner-approval workflows require separate release verification.
What else can help?
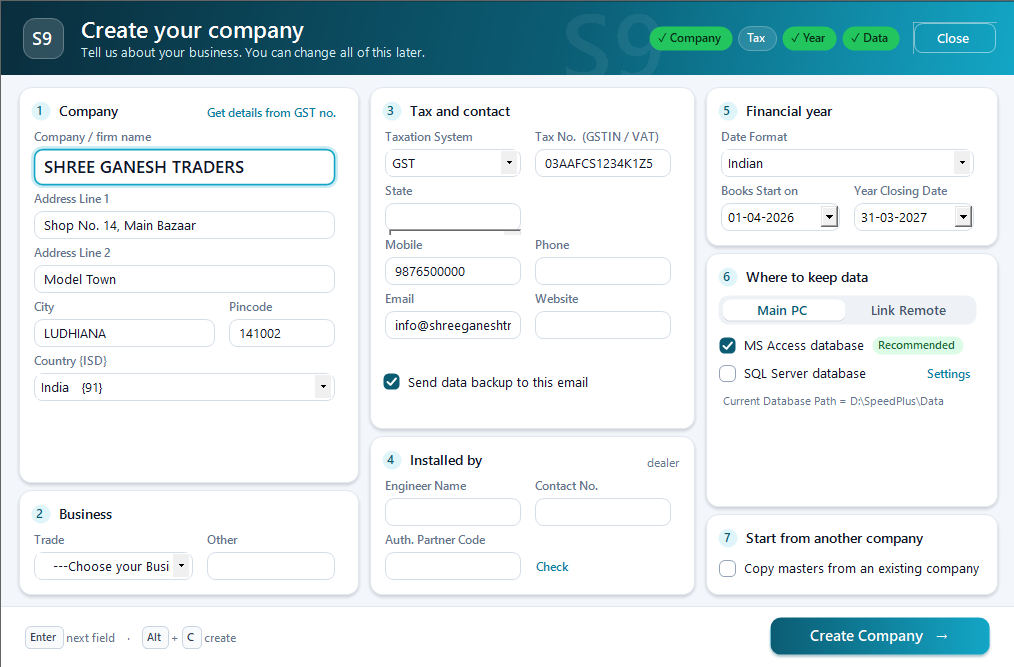
Company setup
Set the company up for the way you trade.
Read the guide →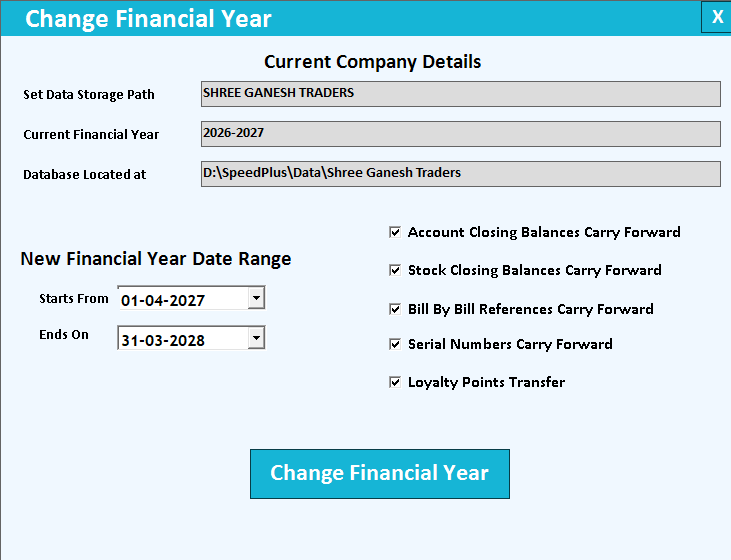
Financial year change
Start the next year with a checked opening position.
Read the guide →Email backup and restore
Make backup a routine, and restore a tested skill.
Read the guide →See it with a sample from your business.
Bring a sample bill or item list. We’ll show you the steps and answer your questions.