Scan items. Take payment. Print the bill.
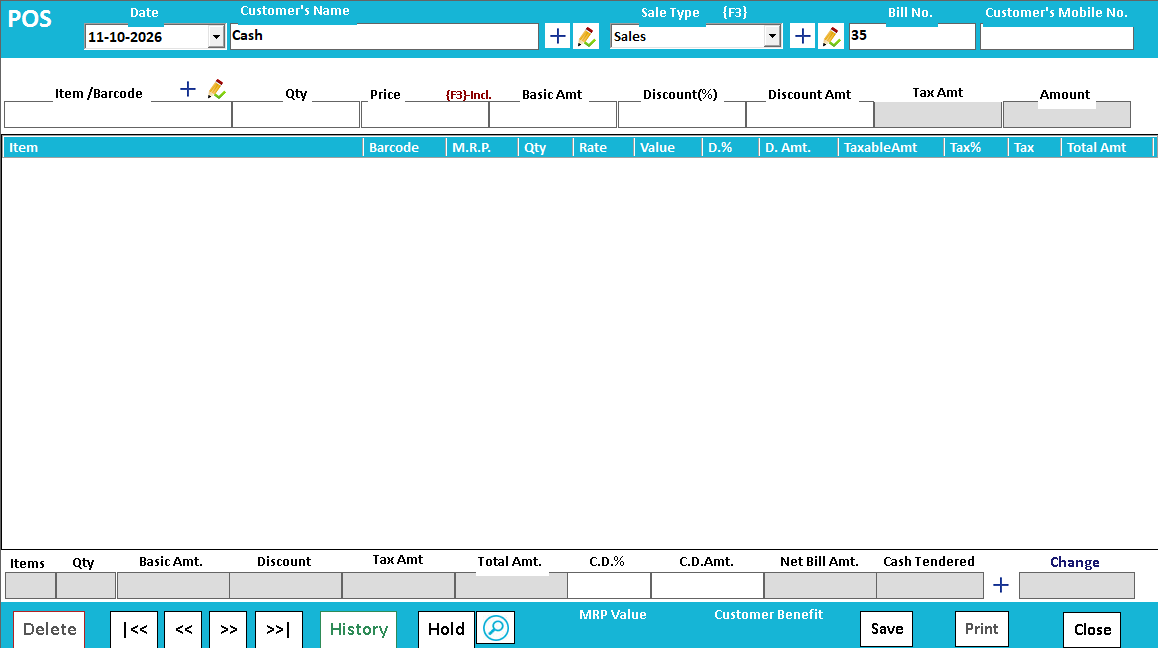
Use POS for everyday counter billing. Check the basket, record the payment and print the configured receipt.
Items at the counter
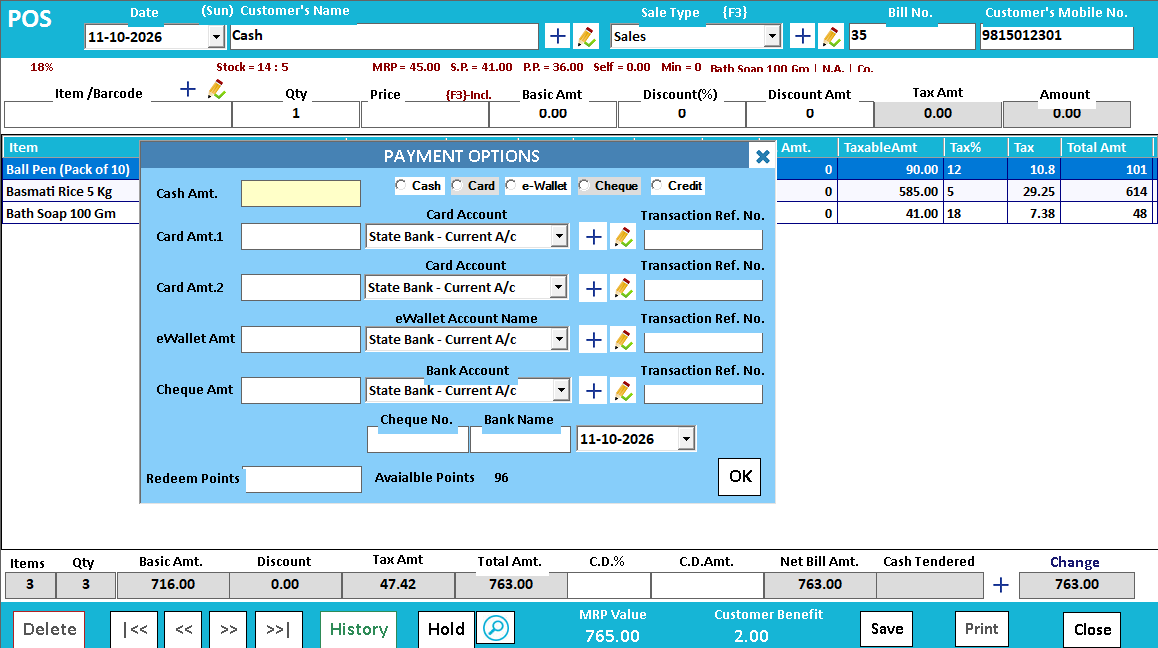
Basket and payment
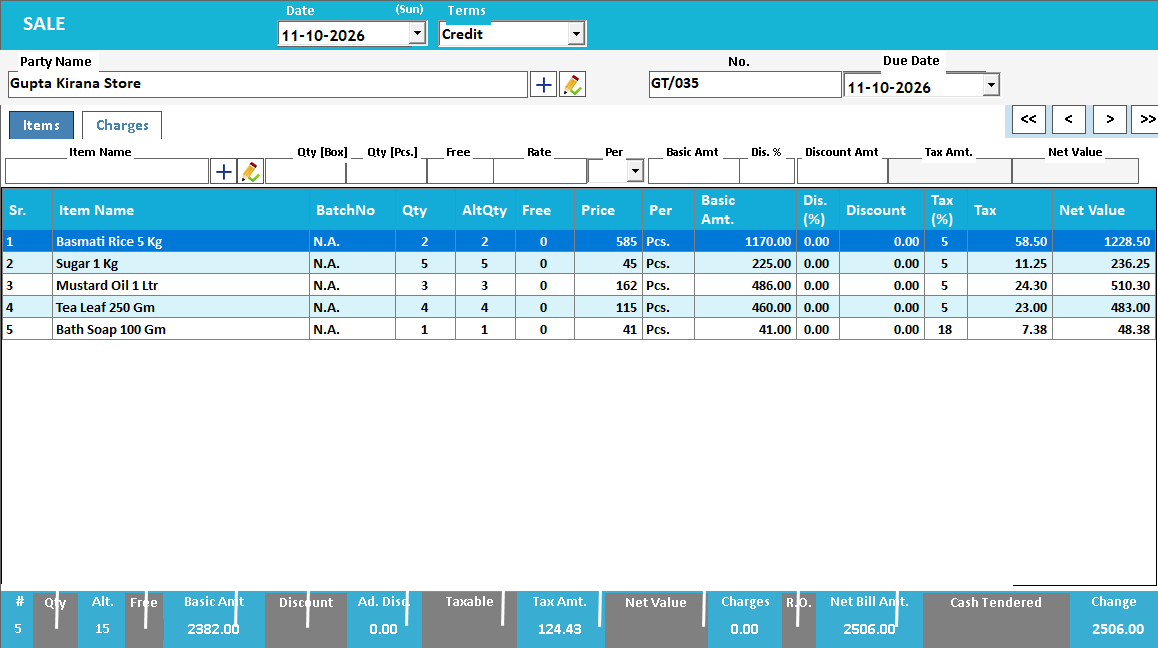
Saved bill and receipt
See the screens behind the workflow.
Real screens from the Speed Plus 9 manual. Open any image to inspect the details.
 View full size ↗
02Review payment and available loyalty points+
 View full size ↗
A counter sale needs a short, clear journey.
POS brings the repeated work of checkout into one counter workflow: identify items, review the basket and complete payment. It is useful where the cashier handles many small transactions and needs a consistent path from product to receipt.
Add items by the supported search or scanning method, check quantity and the applicable rate, then choose the payment method. A held bill lets the cashier pause a customer basket while handling another transaction; it still needs to be recalled and settled correctly. Serial-based selling also requires the correct physical unit.
How to use it.
Scan items. Take payment. Print the bill.
- 01
Find or scan the items
- 02
Review quantities, prices and the bill total
- 03
Select the payment mode and print the receipt
What this looks like in your business.
A grocery cashier adds packaged products and a loose item to the same sale, then reviews the bill before collecting payment.
Serve the next customer without losing the current basket.
Follow the decisions as well as the clicks.
- 01
Start the basket
Open POS → New. Scan a barcode or enter the item code, then check the selected item and quantity. A serial-tracked product uses the actual piece’s serial number.
- 02
Keep the sale identifiable
Enter the customer’s mobile number when using loyalty. Review discounts and the basket before moving to payment; an incorrect item selection will also affect stock.
- 03
Hold when the customer steps away
Use Hold POS Bill to park an unfinished basket and serve the next customer. Recall the held bill when its customer returns, then check it before collecting payment.
- 04
Collect and print
Choose the payment allocation, confirm what was received and save the bill. Print the configured receipt. The saved sale updates stock and accounts.
Based on User Manual 2026 · 13.1–13.4. Screen names and availability can vary by installed version.
Good questions.
Clear answers.
Choose the workflow that fits your business and confirm its setup in a demonstration.
When should I use the regular sale screen instead?
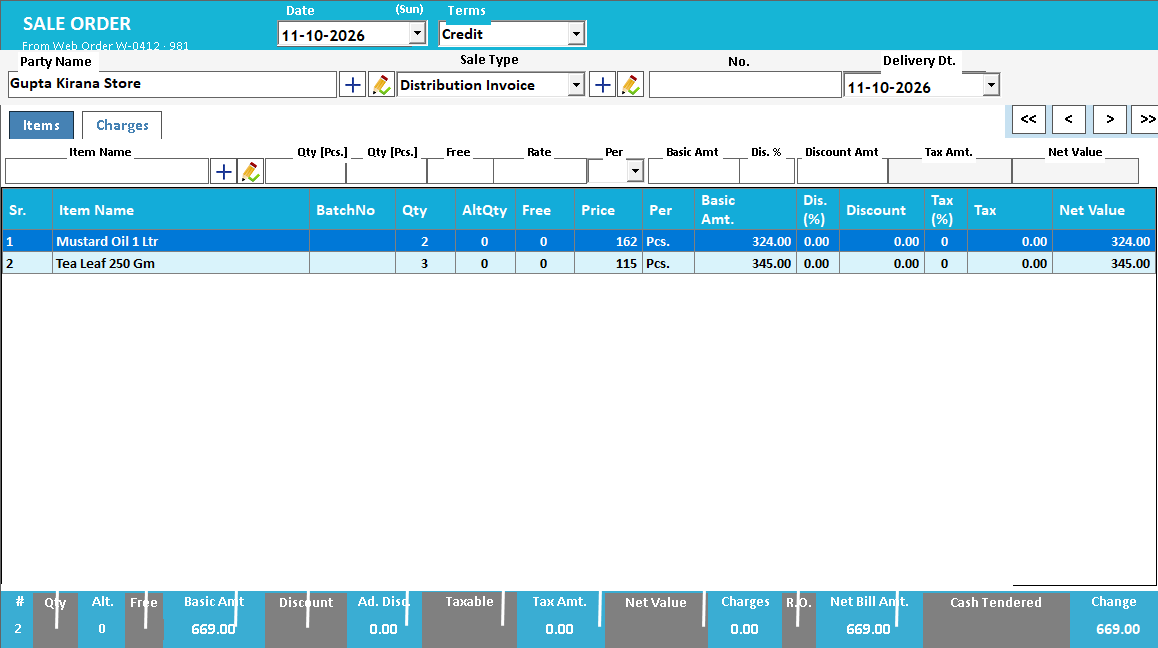
Use the workflow that suits the information you need. A detailed trade invoice may need more document or account fields; a counter transaction benefits from the POS sequence. Demonstrate both with a real example before deciding.
What setup should I confirm?
Confirm scanner, receipt printer and payment-mode compatibility with your counter setup.
Run a busy billing counter
From the item on the shelf to the receipt in the customer’s hand.
- 01Item master and searchRead guide →
- 02Barcode checkoutRead guide →
- 03Regular POSYou are here
- 04Split paymentsRead guide →
- 05Custom bill formatsRead guide →
What else can help?
See it with a sample from your business.
Bring a sample bill or item list. We’ll show you the steps and answer your questions.